If you're a surfer, you know how important it is to have reliable surfboard covers to protect your board during transport. While there are plenty of options available for purchase, creating a custom surfboard bag can give you a personalized touch and allow you to have some fun in the process. Although sewing your surfboard case may seem like a daunting task, sewing can be a fun and rewarding project. Of course, it does require some basic sewing skills, but with patience and dedication, you can create a bag that perfectly fits your board. Keep reading to learn how to sew a board bag.
Gather Materials
Before starting to sew a surfboard bag, gather these necessary materials:
- Heavy-duty, water-resistant fabric such as canvas or nylon. The amount of fabric needed will depend on the dimensions of your surfboard. Choose a fabric that is 2x wider than your board and about 6-12 inches longer than your surfboard. Good fabric can be found on This Website.
- Thick and durable thread that is suitable for the chosen fabric. Usually, #69 bonded nylon thread will work, and it is the largest thread count that fits in a home sewing machine.
- A sewing machine that can handle thick fabric. Singer Heavy Duty Sewing Machine is a good option.
- Scissors, ideally fabric shears.
- Tape measure for measuring dimensions accurately.
- Pins or sewing clips are used to secure the fabric in place.
- Optional: drawstring cord and grommets for a drawstring closure, iron for seam pressing.
- Chalk will mark where you will cut your fabric.
By having all the materials at hand, you can start your surfboard cover project with confidence.
Steps To Sew a Surfboard Bag:
Step # 1 Measure and Cut the Fabric
To create a surfboard bag, it's important to measure your board and add a few inches to the length and width for the perfect fit. Once you have measured the correct amount of fabric, cut the fabric roughly to your needed length. Lay your surfboard on top of the fabric. If the fabric is wide enough, fold it in half so that your surfboard is lying on top of 2 pieces of fabric. You will need two pieces of fabric to make a bag. If your fabric is not wide enough, you will need to complete the following steps twice so that you have two identical pieces of fabric.
- When you have your fabric cut to length and your surfboard is lying on top, trace the outside edges of your surfboard with the chalk. Be sure to leave some room for a seam allowance (room to sew). It is better to go wider than thinner when tracing your board.
- Be sure to mark this on the wrong side of your fabric. You will sew the two 'wrong sides' together and turn it inside out when completed, so it is all right to have markings on this side of the bag.
- Once you have traced your surfboard size with the chalk on the fabric, take your fabric shears (or regular scissors. Just make sure that they are sharp) and cut along the chalk line.
- Suppose you had your fabric folded in half, but try not to move this fabric. If you cut in two separate pieces, line up the two pieces on top of each other. MAKE SURE THAT the two right sides are touching and the two wrong sides are facing outwards.
- The next step is to pin the edges together. You can use fabric pins, clips, or at home alligator clamps
Step # 2 Sew the Two Pieces Together
To make a surfboard cover, make sure you have two pieces of fabric, the wrong sides facing out, pinned together and cut to the shape of your board. The next step is to sew along the sides. We recommend using a ¼” seam allowance and a wide single-needle stitch. Sew along the sides of the bag, leaving the bottom open. Next, turn the surfboard canvas bag on the right side out and give your board a test slide to make sure it fits all right!
Step # 3 Create the closure system
Make sure you take your board out of your bag, turn the bag back inside out, and fold up the bottom 2-3 inches to sew the hem. More about how to sew hems HERE. When sewing your hem, leave an open space for you to put your drawstring through. Video below shows you exactly how to do this.
Finishing Touches
After you finish making your surfboard bag, you can consider some additional touches. One option is to add your name to the outside of the bag or any other artwork that you have. You can use screen printing ink and a heat gun to cure the ink or make your own fabric stamp and use the oil-based ink that comes with it to customize the design on your bag.
Conclusion

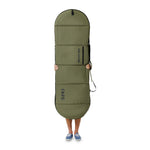
In conclusion, sewing your own surfboard carrier can be a fun and rewarding project that not only saves you money but also allows you to customize the bag to your specific needs. Whether you're a beginner or an experienced sewer, following the steps outlined in this guide should help you create a functional and stylish board bag to protect your board during transport. If you're looking for a high-quality surfboard bag, consider checking out FARO's 7' surfboard bag, which is made with sustainable and durable materials and designed to last for years of use. Invest in a quality surfboard bag to ensure your surfboard stays safe and protected during your next adventure.
If sewing your own surfboard bag proves to be too tricky, or if you are just in the market for a padded travel surfboard bag, check out FARO BOARD BAGS large collection of surfboard socks, board covers, and padded board bags. If you do not see an option for your surfboard please contact us, we can custom make a board bag to fit your exact surfboard size!
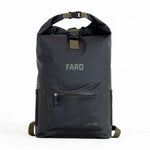
Surfboard bags range in size from 6’ - 11’ and that is not all, we also hand make accessories like fin wallets, dry bag backpacks, and we design apparel all out of our little san diego workshop.
Shop FARO today for the best board bags of 2024!

